Webhook Configurations
Data Supported
Currently the supported data passed in webhooks are the following:
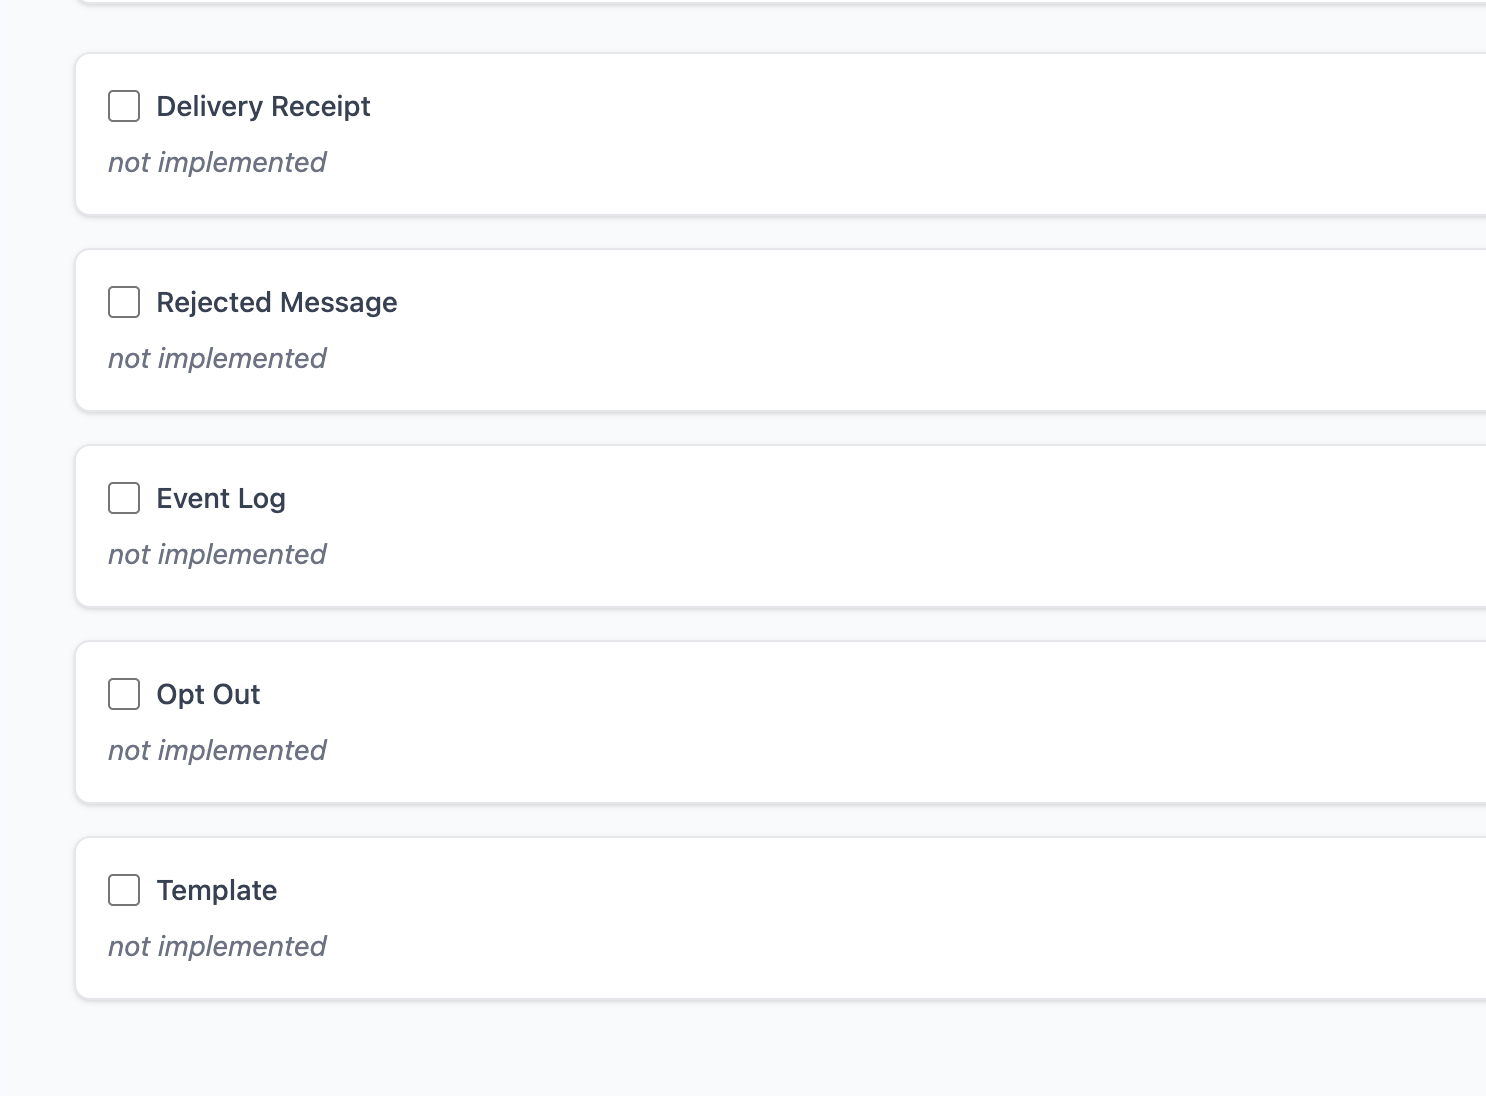
- Delivery Receipts
- Rejected / Dropped Messages
- Event Logs (Clicks)
- Opt Outs
- Templates
Create Webhook
Navigate to Settings -> Webhooks -> Create Webhook
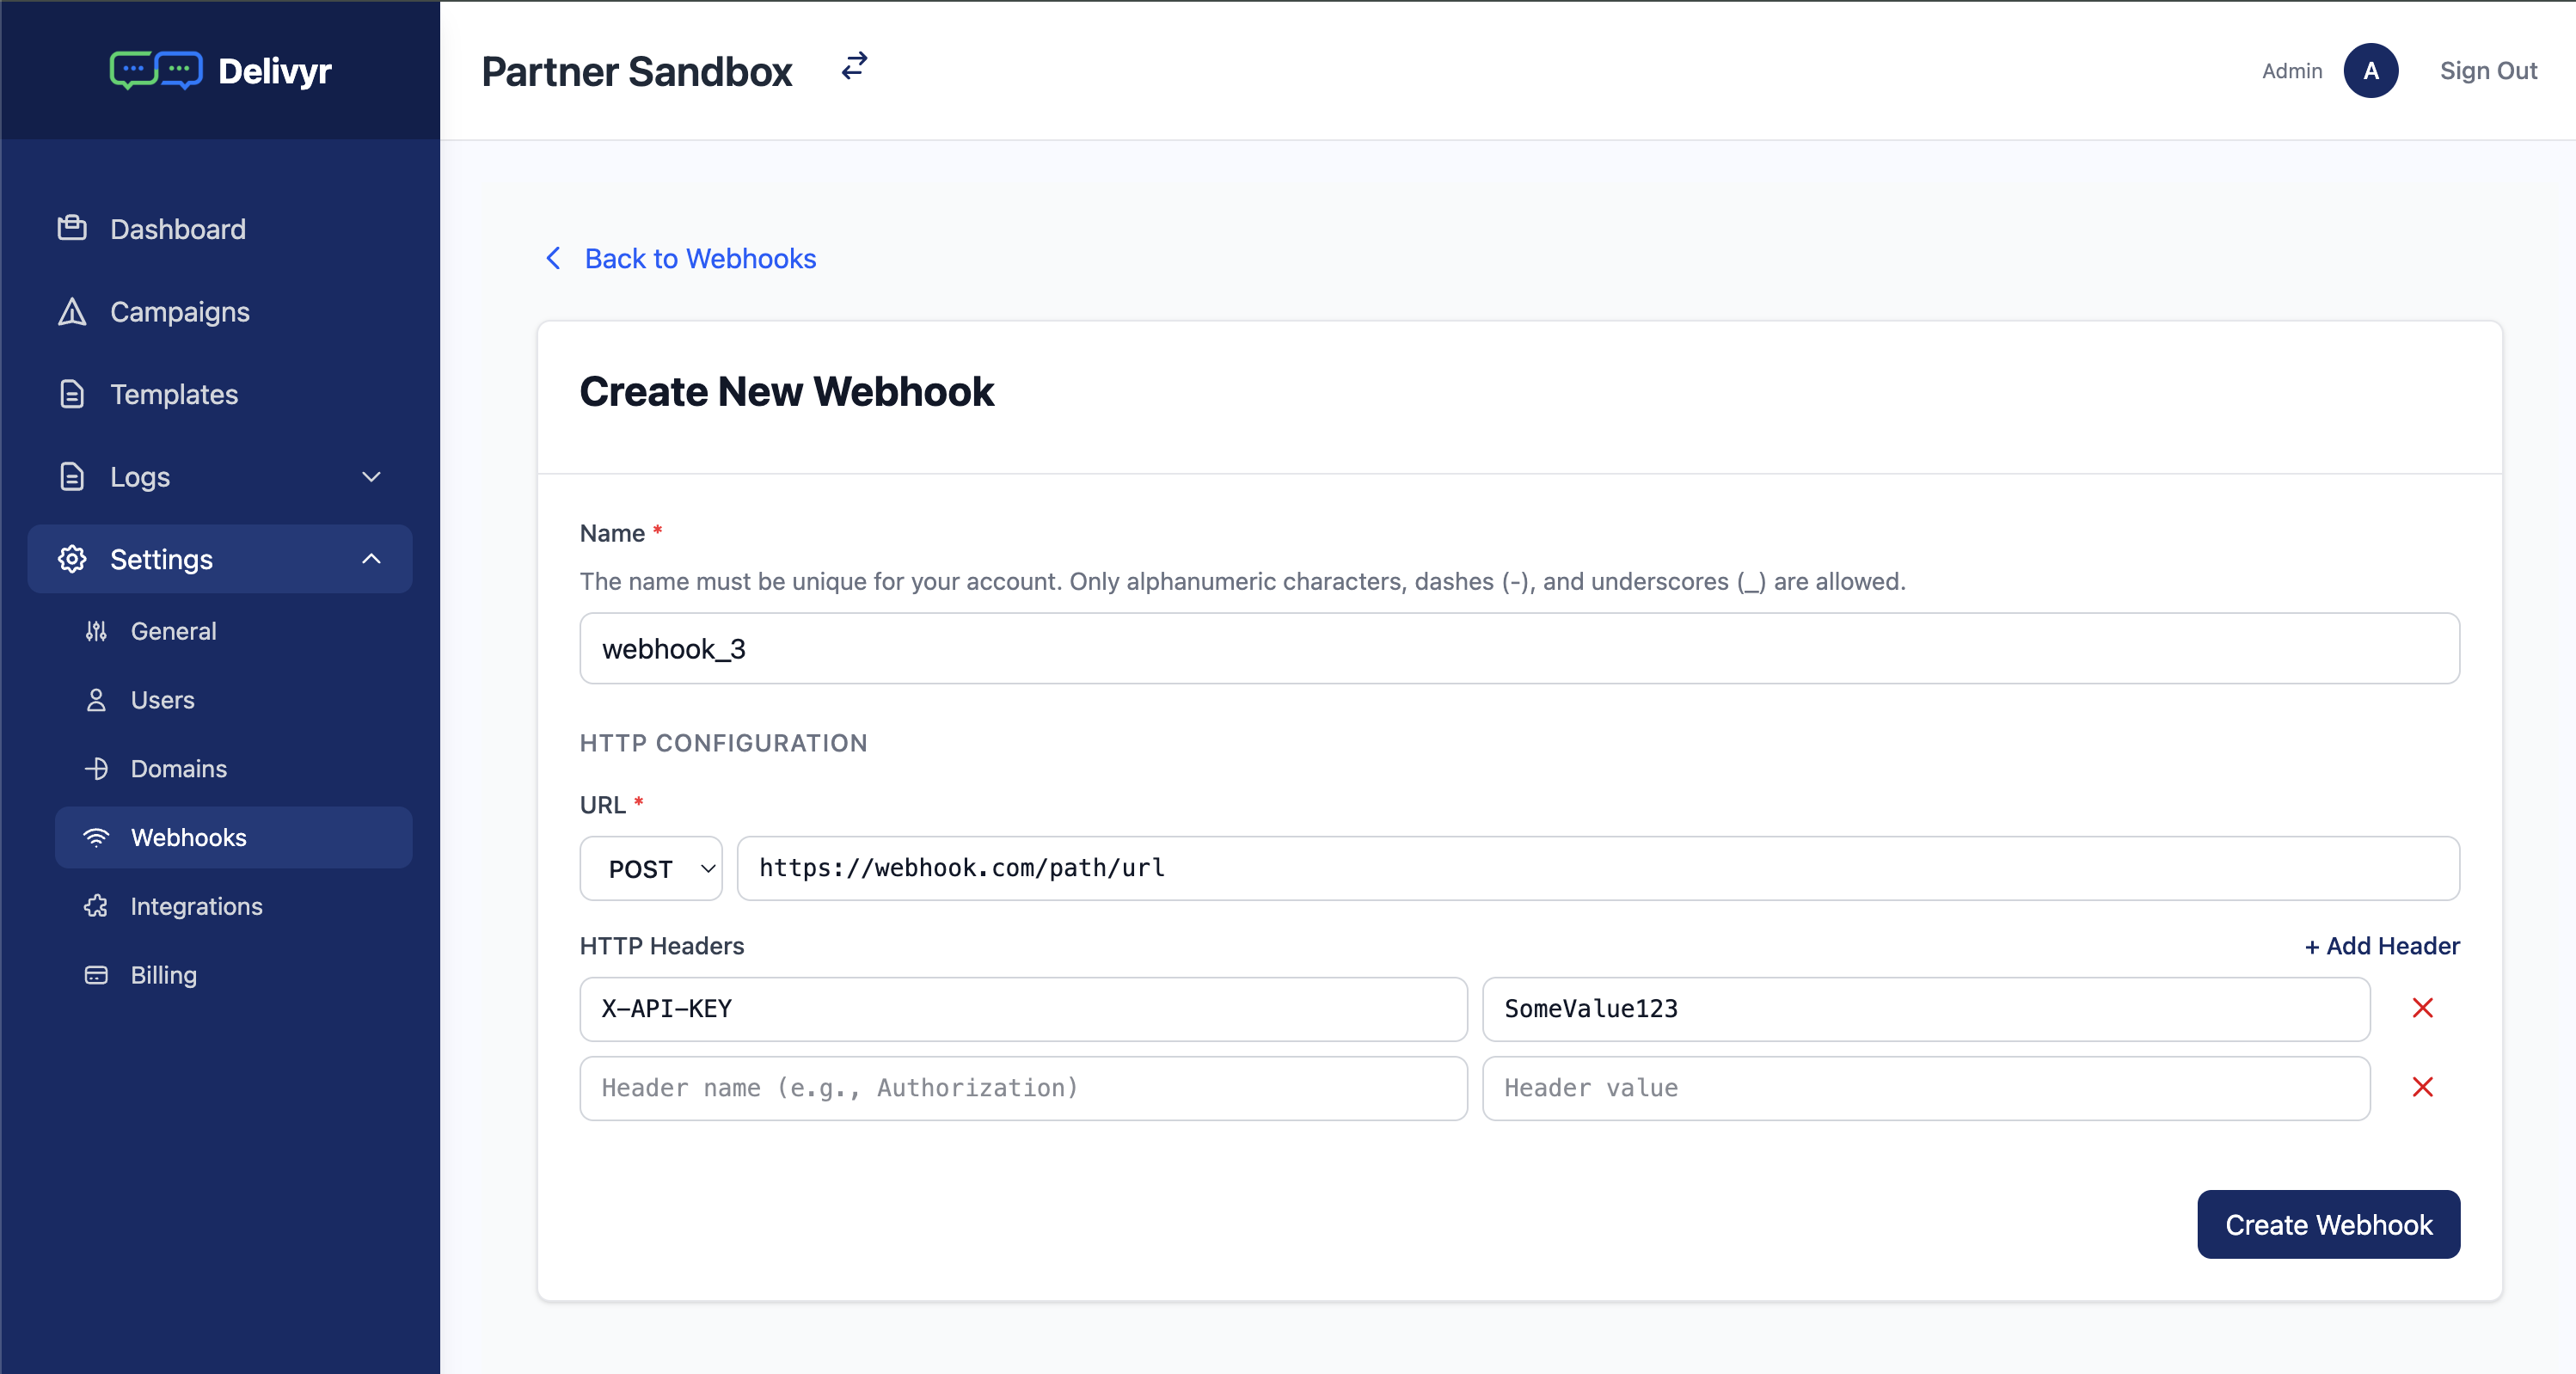
Fill in the the mandatory fields.
The name cannot be edited once created, and must be unique per account.
You may create multiple webhooks that subscribe to particular events.
Configuring The Webhook
After you create the webhook, you will be presented with checkboxes on which events you would like to subscribe to.
Once you check the checkbox, and you will be presented with a text area allowing you to configure the webhook payload to your preference. You can input any valid JSONata. JSONata has a useful exerciser tool to try more complex configurations. https://try.jsonata.org/
Simple Example:
A basic example of simply returning status and epoch
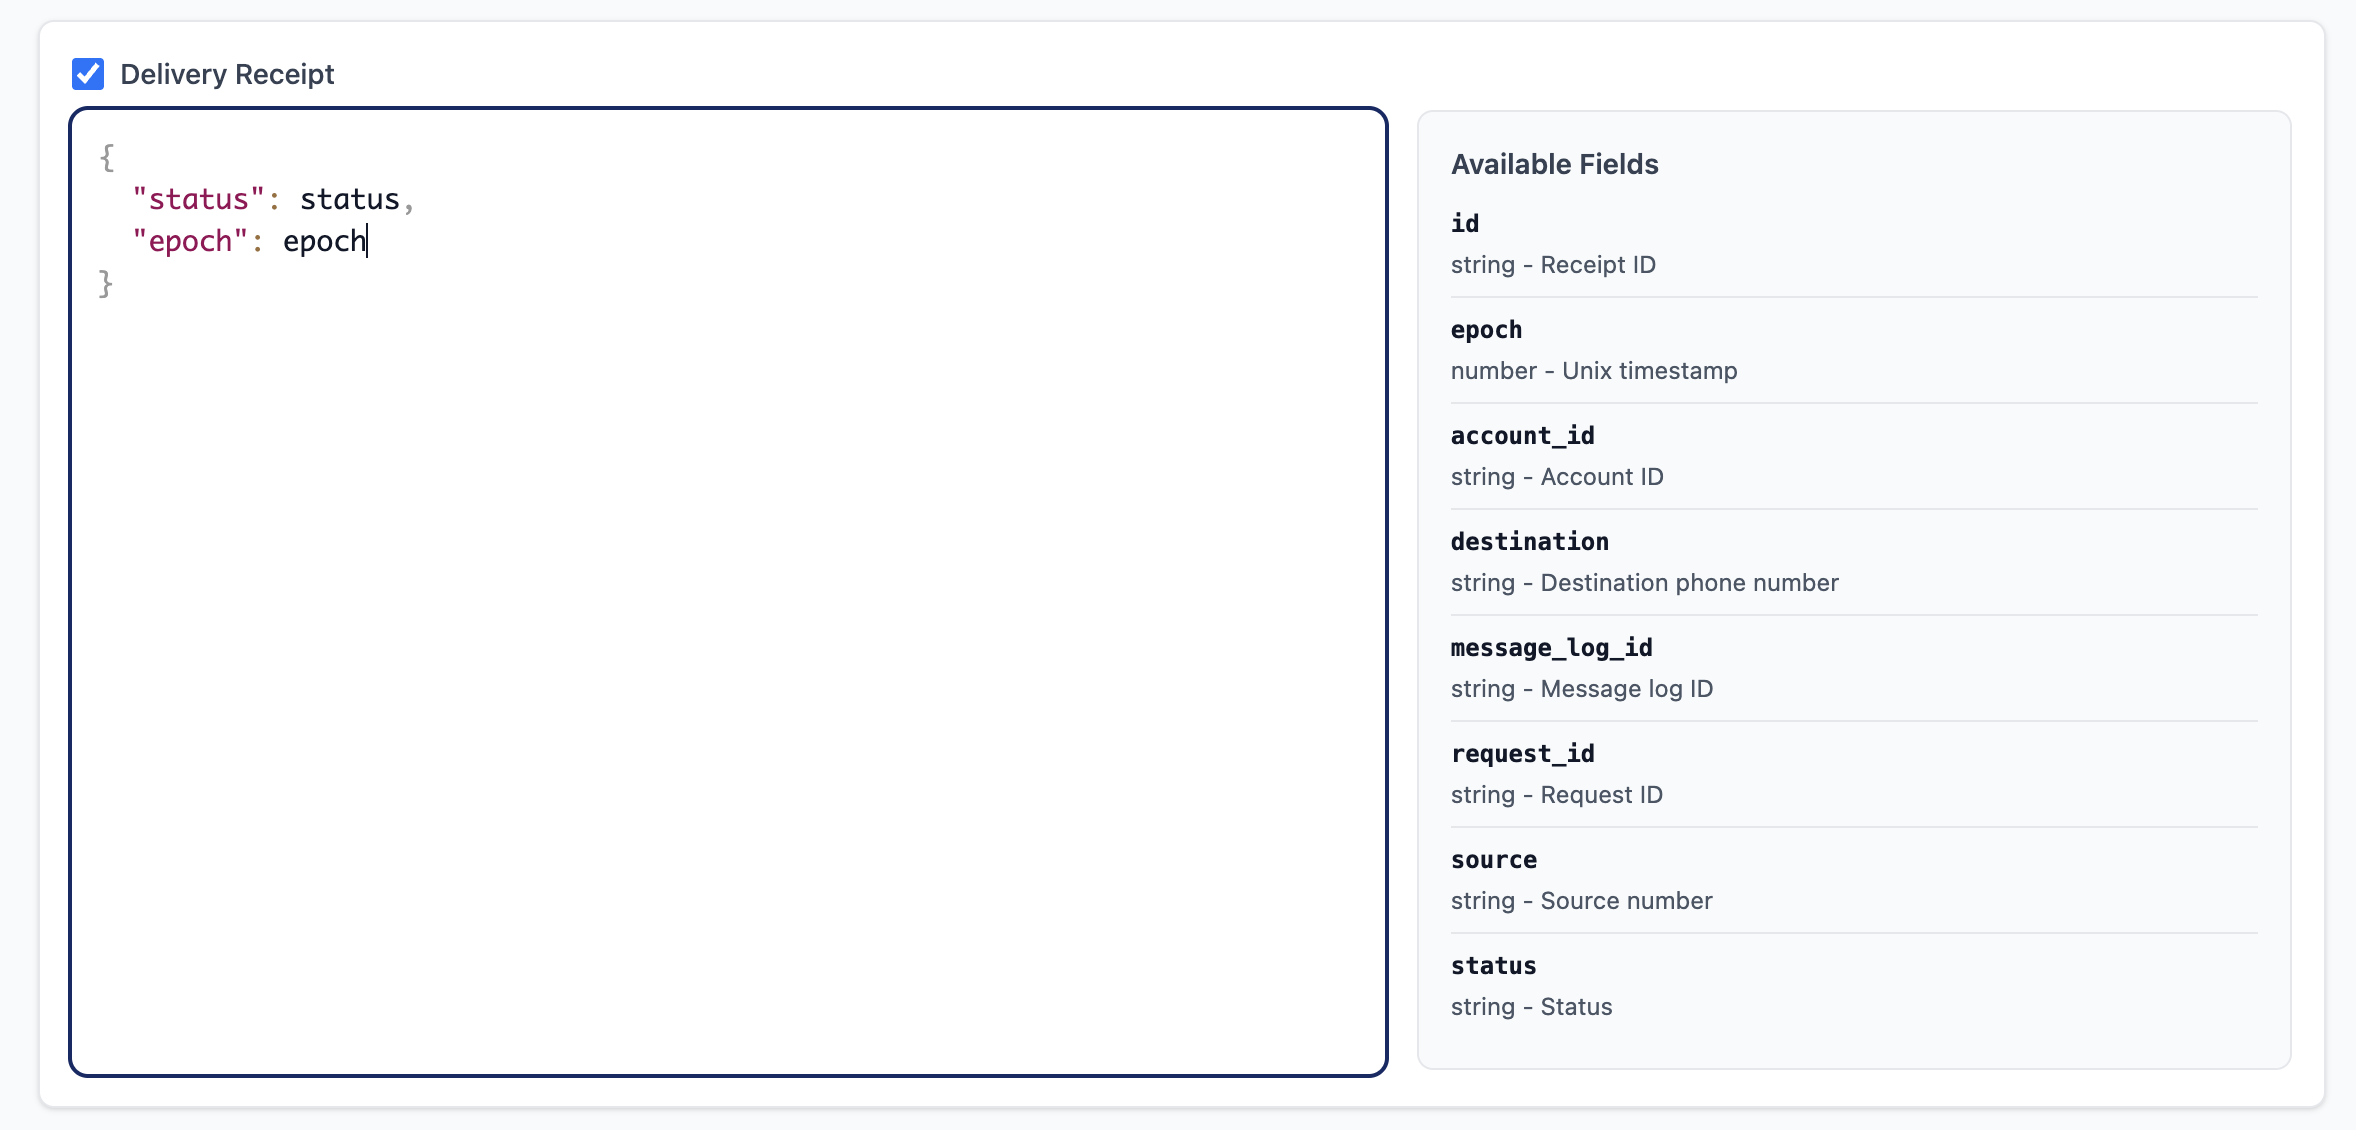
{
  "status": status,
  "epoch": epoch
}
Above is a very simple example of sending the status, and the epoch of the delivery receipt. On the right side you will see all the available variables you can choose from. Include as many or as little as you want.
Advanced Example 1
You can format the response by having nested values, using simple logic, or using native JSONata functions.
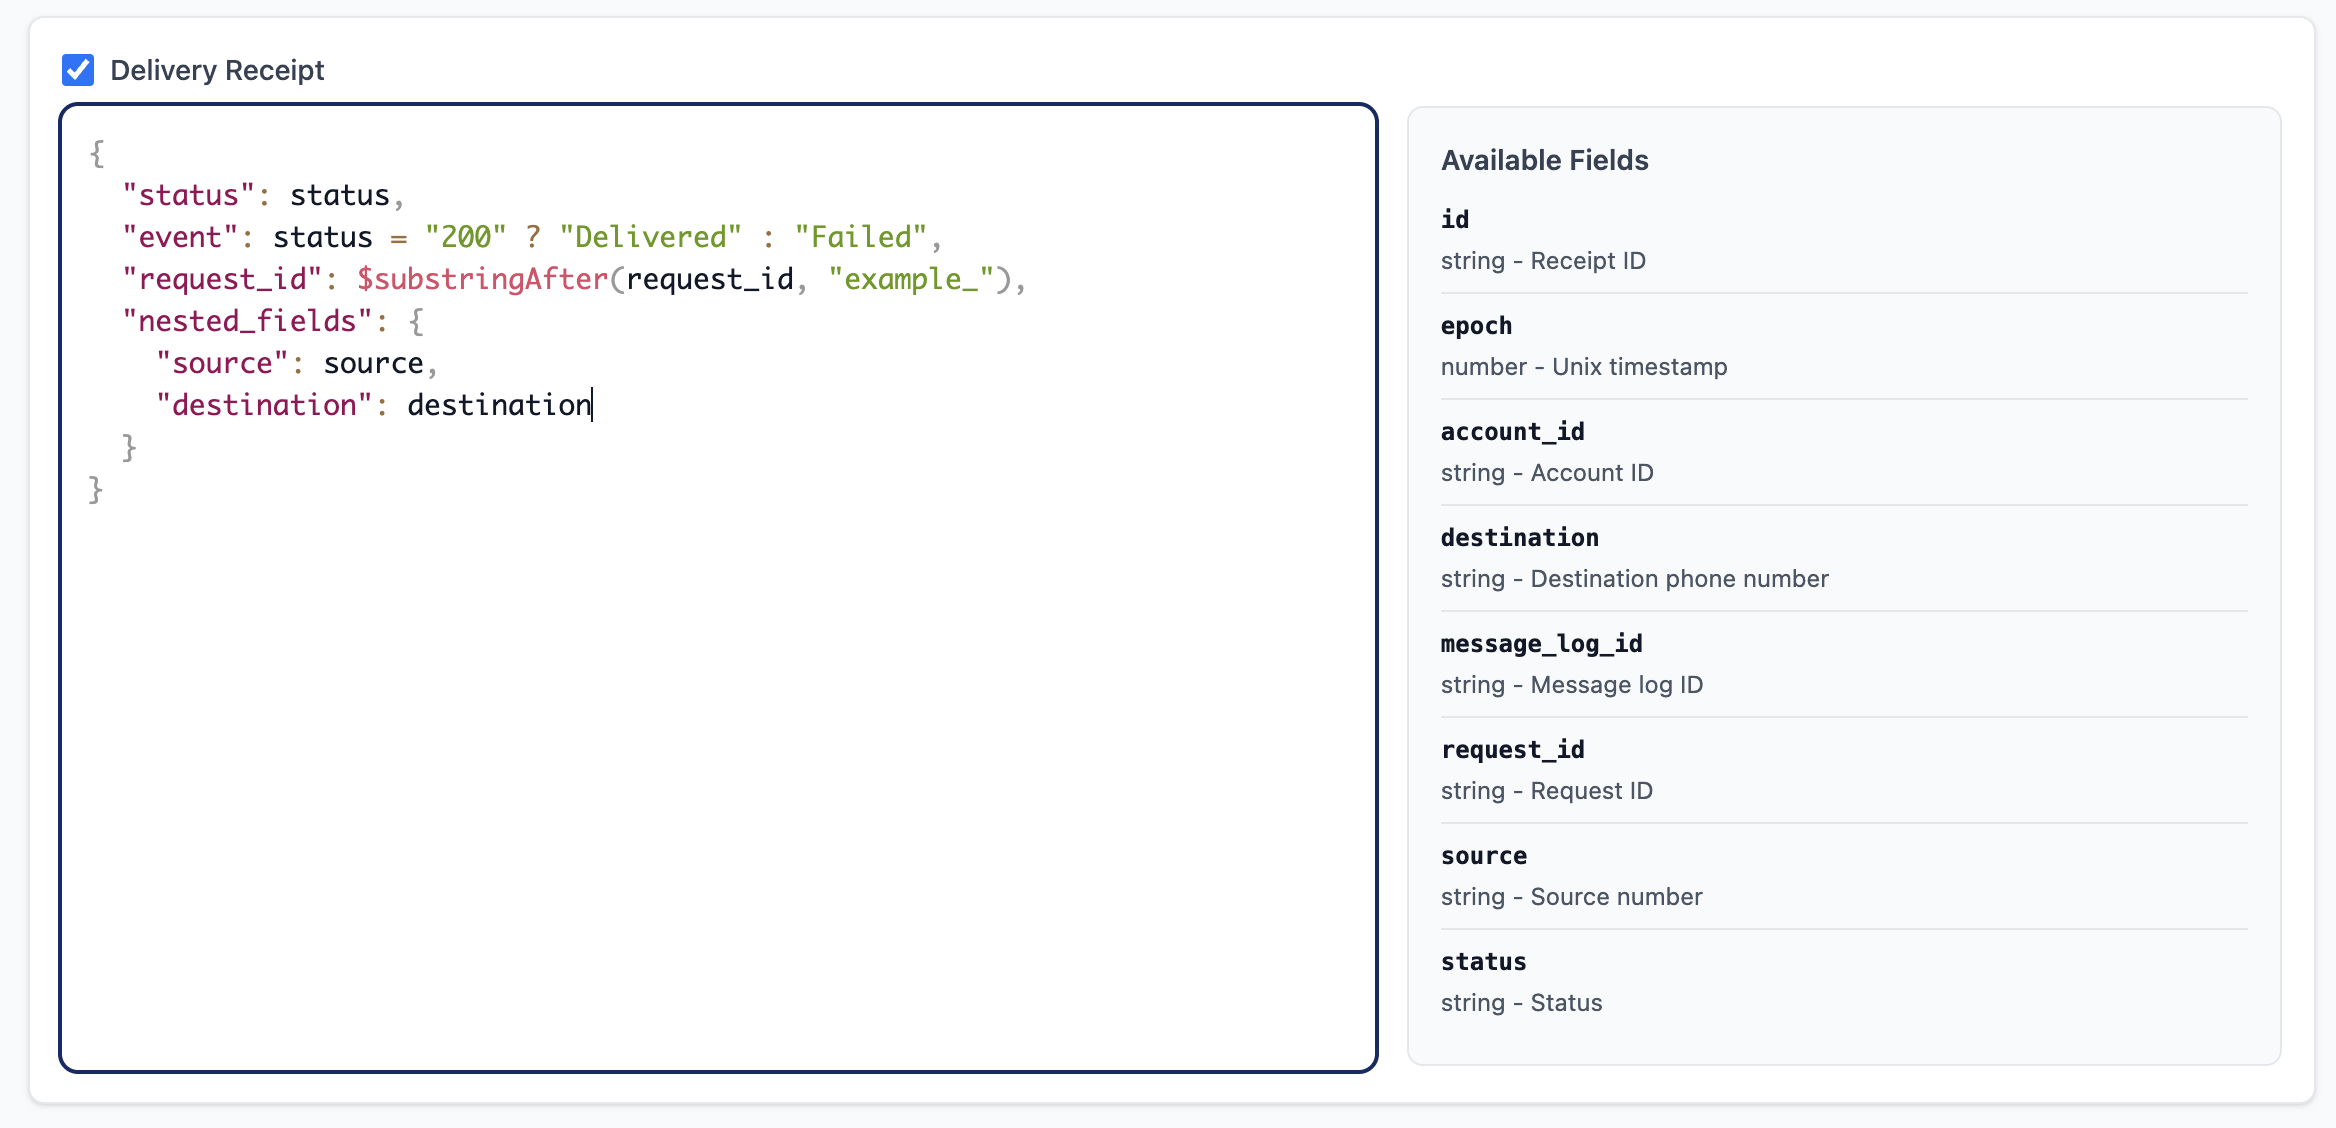
{
  "status": status,
  "event": status = "200" ? "Delivered" : "Failed",
  "request_id": $substringAfter(request_id, "example_"),
  "nested_fields": {
    "source": source,
    "destination": destination
  }
}
The example above shows how you can use simple JSONata functionality to modify the request values to fit your needs. The event will return Delivered or Failed based on the status value being 200 or not. The request_id is returning the substring beyond the prepended value of example_. If the value example_123 was sent as the request_id, the function will return 123.
Advanced Example 2
Splitting the request_id
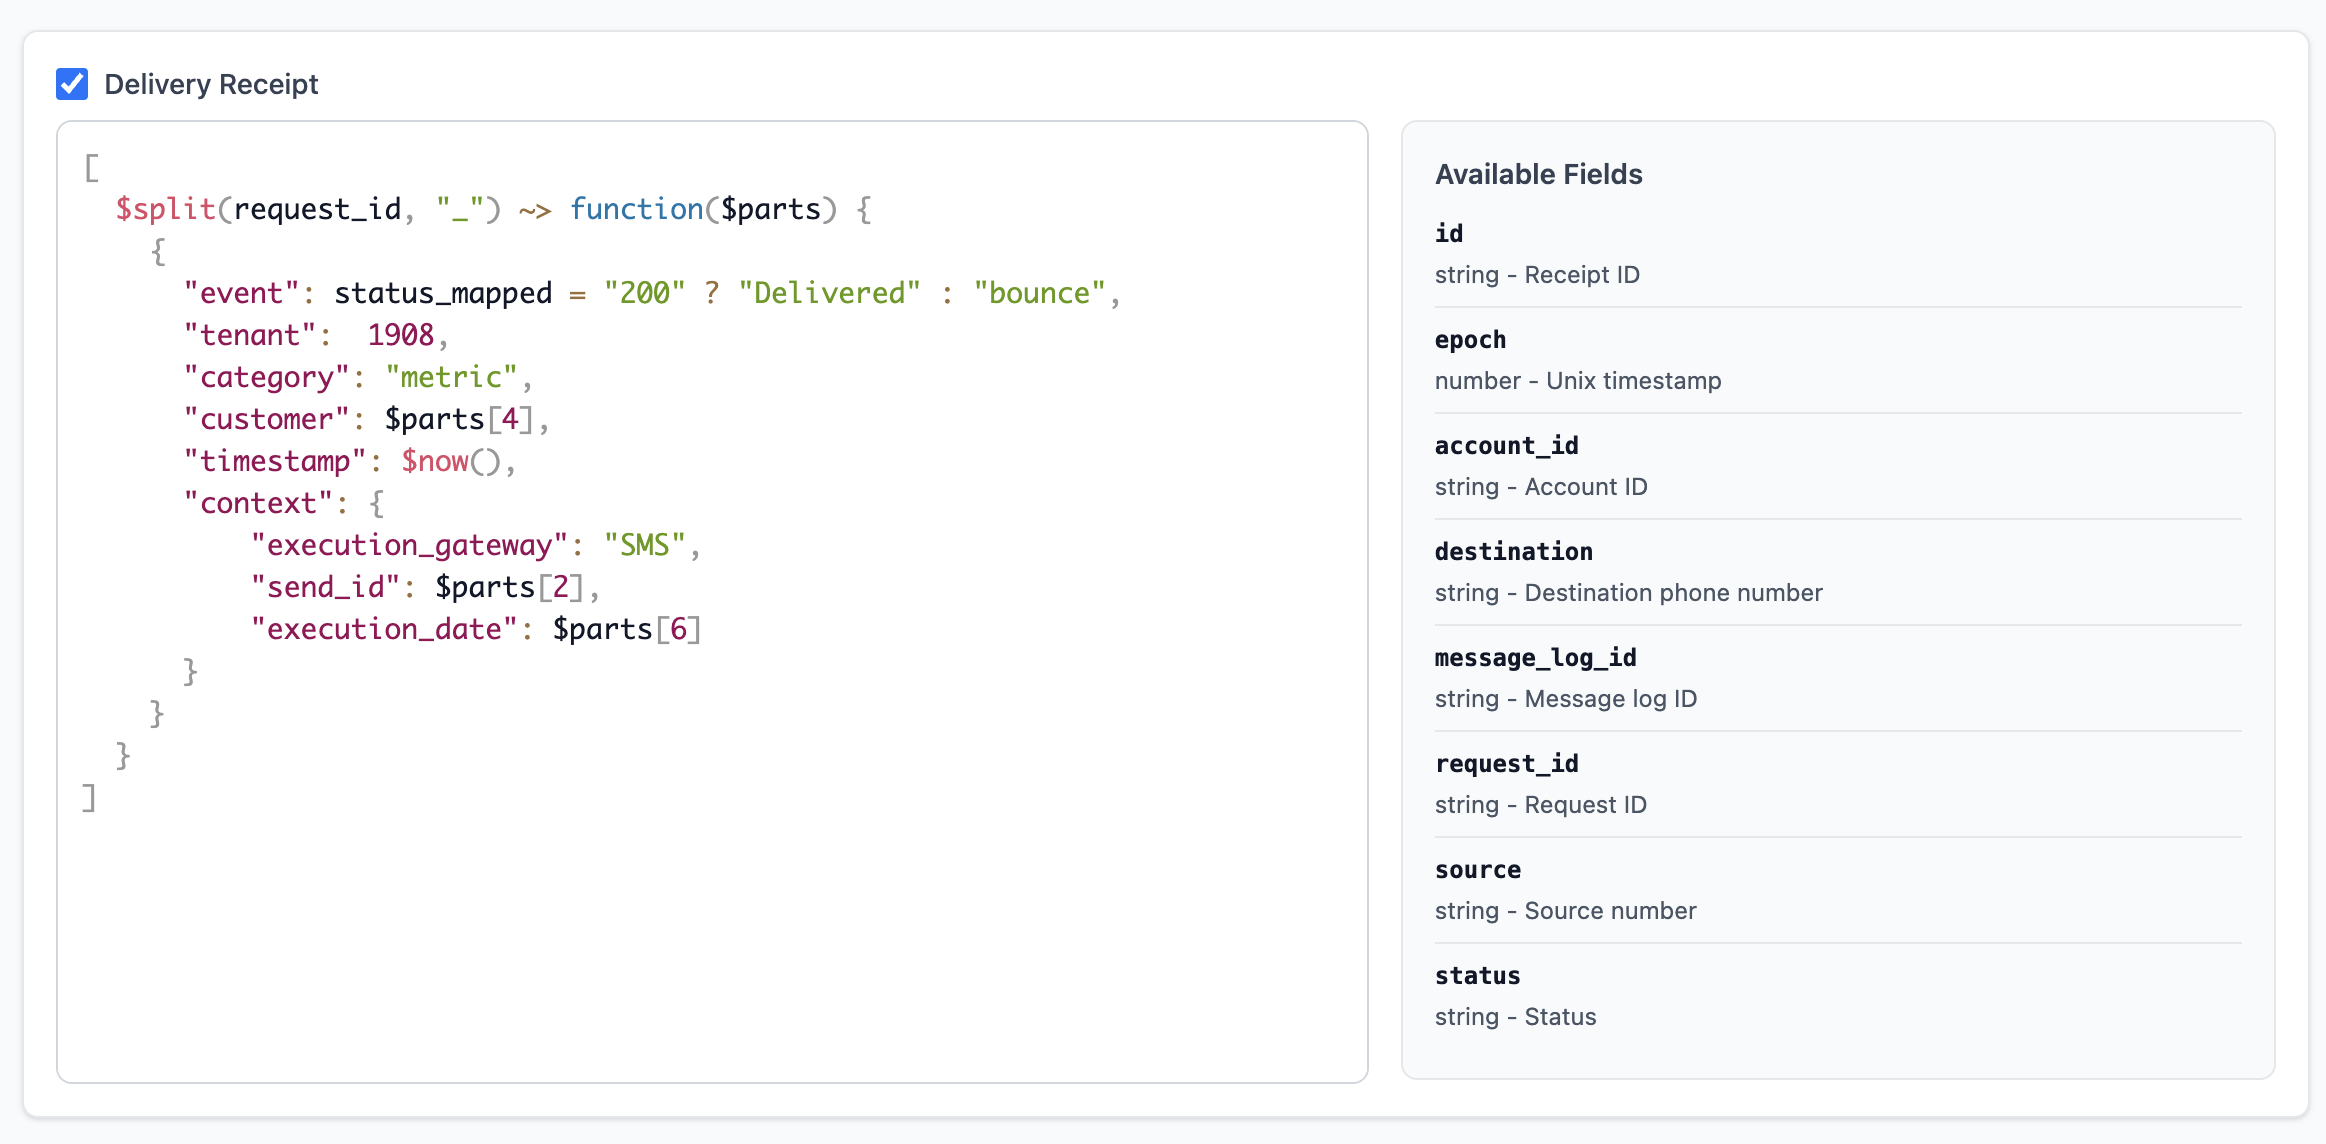
[
  $split(request_id, "_") ~> function($parts) {
    {
      "event": status_mapped = "200" ? "Delivered" : "bounce",
      "tenant":  1908,
      "category": "metric",
      "customer": $parts[4],
      "timestamp": $now(),
      "context": {
          "execution_gateway": "SMS",
          "send_id": $parts[2],
          "execution_date": $parts[6]
      }
    }
  }
]
In the example above it's going to split the request_id by the _ in parts, and arrange them as needed.
partner_campaign_123_customer_456_date_2029-05-05This is useful if you want to store many pieces of information into the request_id and fit it into a pre-existing API.
Updated 5 months ago