
OneSignal
Integration Guide
Step 1: Access Webhooks Settings
- In your OneSignal dashboard, locate the menu on the left-hand side.
- Click Data > Webhooks.
- Click New Journey Webhook in the top-right corner.
Step 2: Name the Webhook
- Enter a descriptive webhook name, such as
welcome journey.
Step 3: Configure Webhook Details
Fill in the fields with the following details:
-
Method:
POST -
Headers:
x-api-key: (Found in General --> Settings)x-account-id: (Found in General --> Settings)Content-Type:application/json
-
Body: Select Custom Body and enter the following JSON:
Example without variables:
{
  "template_id": "123456",
  "phone_number": "{{user.tags.phone_number}}",
  "url": "https://landingpage.com",
  "request_id": "{{event.id}}"
}
Example with "First Name"
{
  "template_id": "123456",
  "phone_number": "{{user.tags.phone_number}}",
  "url": "https://landingpage.com",
  "request_id": "{{event.id}}",
  "variables": {
    "first_name": "{{user.tags.first_name}}" <--- any tag you want to send
  }
}
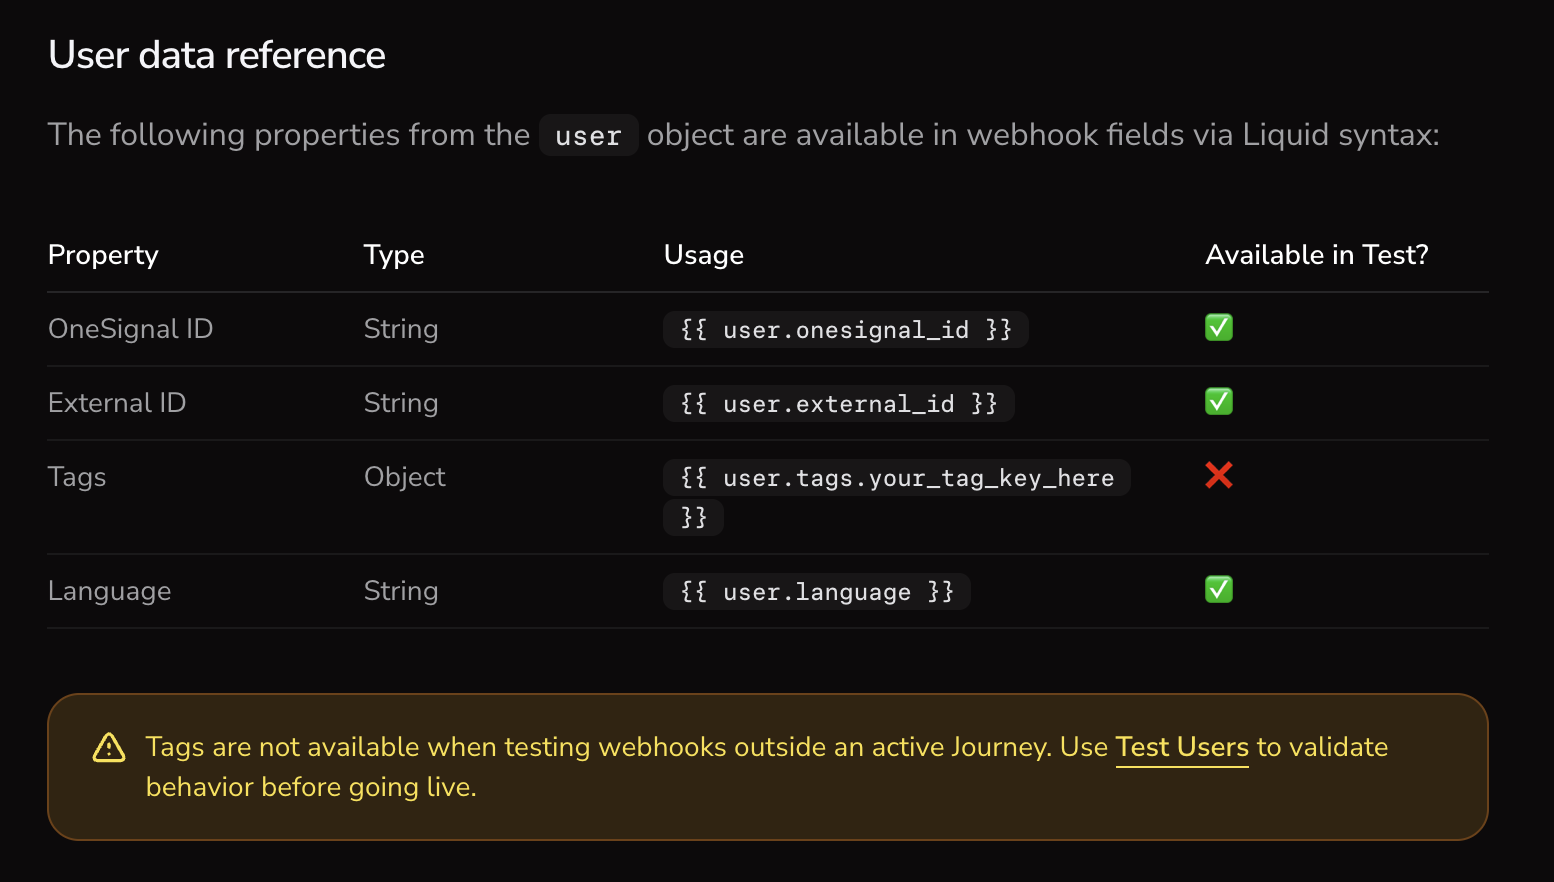
OneSignal user.tags.* are not available in "testing"
OneSignal Documentation Reference:
https://documentation.onesignal.com/docs/en/journeys-webhook
Updated 2 months ago
Did this page help you?